Focusing on one galaxy in a pair
This is a two step process. The first step is locating which pair you want to investigate. Look through the Schema browser to find a suitable survey.

Once you have located the suited survey and know what variables to use, make a categorical query.
This example was done using data from GAMA.
SELECT Gal1CATAID, Gal2CATAID, PairID FROM gama_dr2.G3CGalsInPair
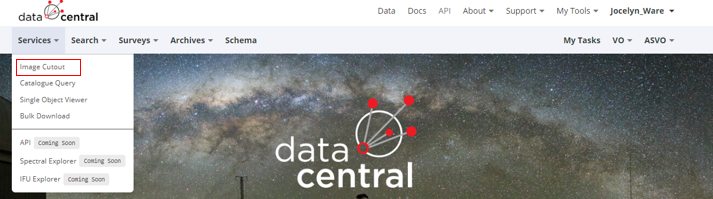
This will produce a table of values. This method works best when you are trying to focus on one particular object but you can do this for a series of objects.This example will focus on one pair . This is done by choosing a corresponding group eg Gal1= 298227 & Gal2=298226. Now that the desired object(s) have been identified, it's time for step two. After the pair as been identified 'Image Cutout' will be used to produce and image.
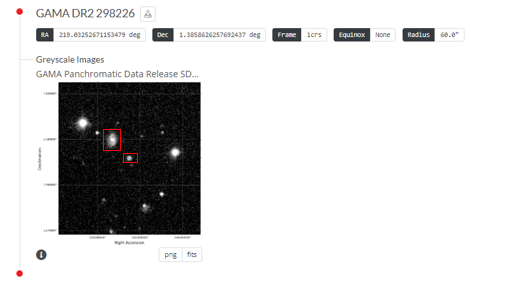
Input one of the objects ID’s into the box ‘Source List’. Include Greyscale and chose GAMA bands of VST with whichever filter is desired. VST is the preferred band because it tends to have the highest resolution thus it will behave better when focusing on certain objects within the image. For a colourful image tick the RGB box, coloured images make it easier to differentiate between objects. It is recommended that a title is added to each image. The locut and hicut adjust how much data is used to produce the image, generally speaking the more you remove the fuzzier the image is because it lacks information. This case will be using the ‘radius’ function to adjust what is visible in an image. After producing an image, the specified object will be in the very center of the graph. Around the object will be it’s paired partner and other astronomical objects. Take note of the Right Ascension and Declination of the object you want to focus on. Make a new cutout image using those numbers but reduce the radius, note that this will ‘zoom’ in on the object which will cause the image to lose clarity. It may take a few attempts to get the desired size. The more zoomed in the image is the fuzzier the image becomes, if this in a problem then the image can be downloaded as a fits file and edited in an external program, ensure the image is viewed in the same scale that it was created in eg log, linear, square. The image can be downloaded via ‘fits’ button located under the image. The pictures below show the original image that focused on 298226 and then the final image that is exclusively 298227.